Designers’ Guide
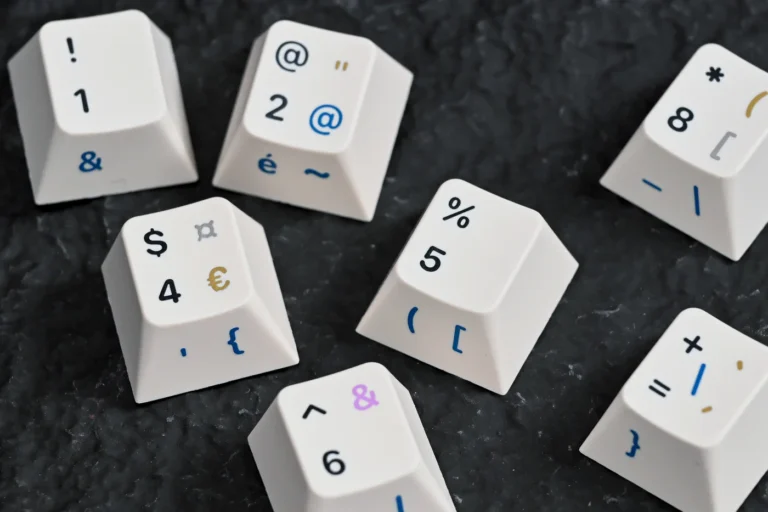
The KAP Legend System is a versatile and modern set of keycap legends in the cylindrical ‘Cherry’ keycap profile for creating doubleshot keycaps, designed by kapowaz and manufactured by Keyreative. This Designers’ Guide is for anyone who is interested in creating and selling keycap sets using these legends.
Materials & Manufacturing
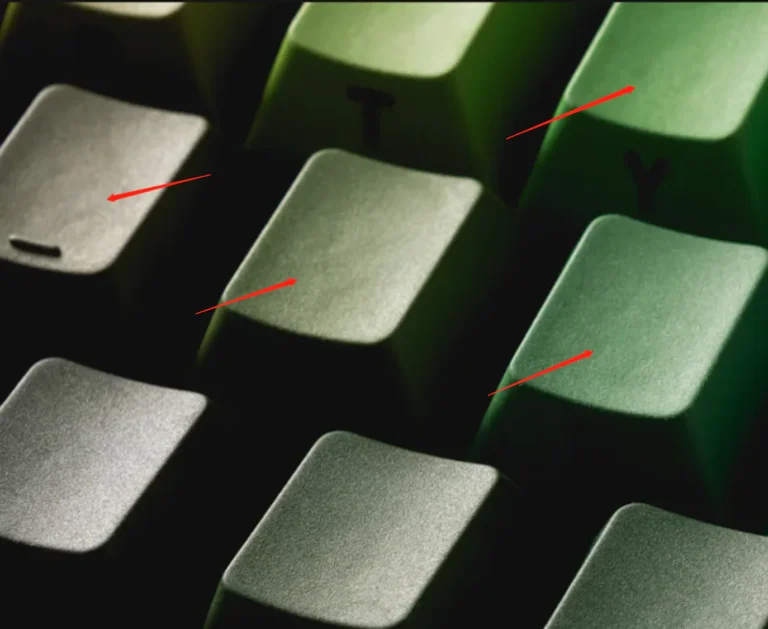
Keycaps using KAP Legend System can be manufactured using a range of techniques and different types of plastic, and have a thickness of 1.7mm. As well as standard ‘doubleshot’ injection moulding, keycaps can also use a ‘hybrid’ dyesub/injection moulding technique (illustrated in the cutaway image below):
In the hybrid doubleshot process, a first shot of white PBT for the legends can be colored using dye-sublimation, before a second shot creates the main keycap surface. This allows for the pin-sharp legend edges associated with a doubleshot process, only with the flexibility of dyesub for coloring individual parts of the legend.
Plastics
The three types of plastic supported are:
- PBT (Polybutylene terephthalate)
- ABS (Acrylonitrile butadiene styrene)
- Polycarbonate
Unless you need transparency or other advanced features like UV printing, Keyreative recommends using PBT for your keycaps. PBT is capable of being made with the same range of bright colors as ABS, with increased durability; ABS will go smooth/shiny on the top surface more quickly with use.
Each type of plastic has advantages and limitations, depending on what you’re trying to achieve with your design:
- Dyesublimation requires that any part of the keycap with dyesub legends be manufactured with PBT (and the first shot should be a light color, such as white)
- Hybrid doubleshot requires the inner (legend) shot be manufactured with PBT (with the same light color restriction)
- Transparent parts need to be ABS or Polycarbonate; Polycarbonate can only be used for the inner (legend) shot
- UV printing requires that the outer shot uses ABS, since UV printing does not adhere well to PBT. Note that UV legends have much lower durability than doubleshot or dyesub legends.
Supported Layouts
We’ve manufactured injection moulding inserts for over 600 different combinations of legend and row profile, to support the most popular keyboard layouts used by enthusiasts. Additionally, we’ve included support for several less well-supported locales and layouts traditionally underserved by the mechanical keyboard community.
All of the default kits can be customized according to your needs, but in most cases they should provide good support for most customers unmodified.
Base Kit
The default base kit includes support for common layouts including 60%, 65%, 75%, TKL and ‘full’ 105-key layouts, with localization for both ANSI and ISO-UK, and support for a Tsangan modifier layout.
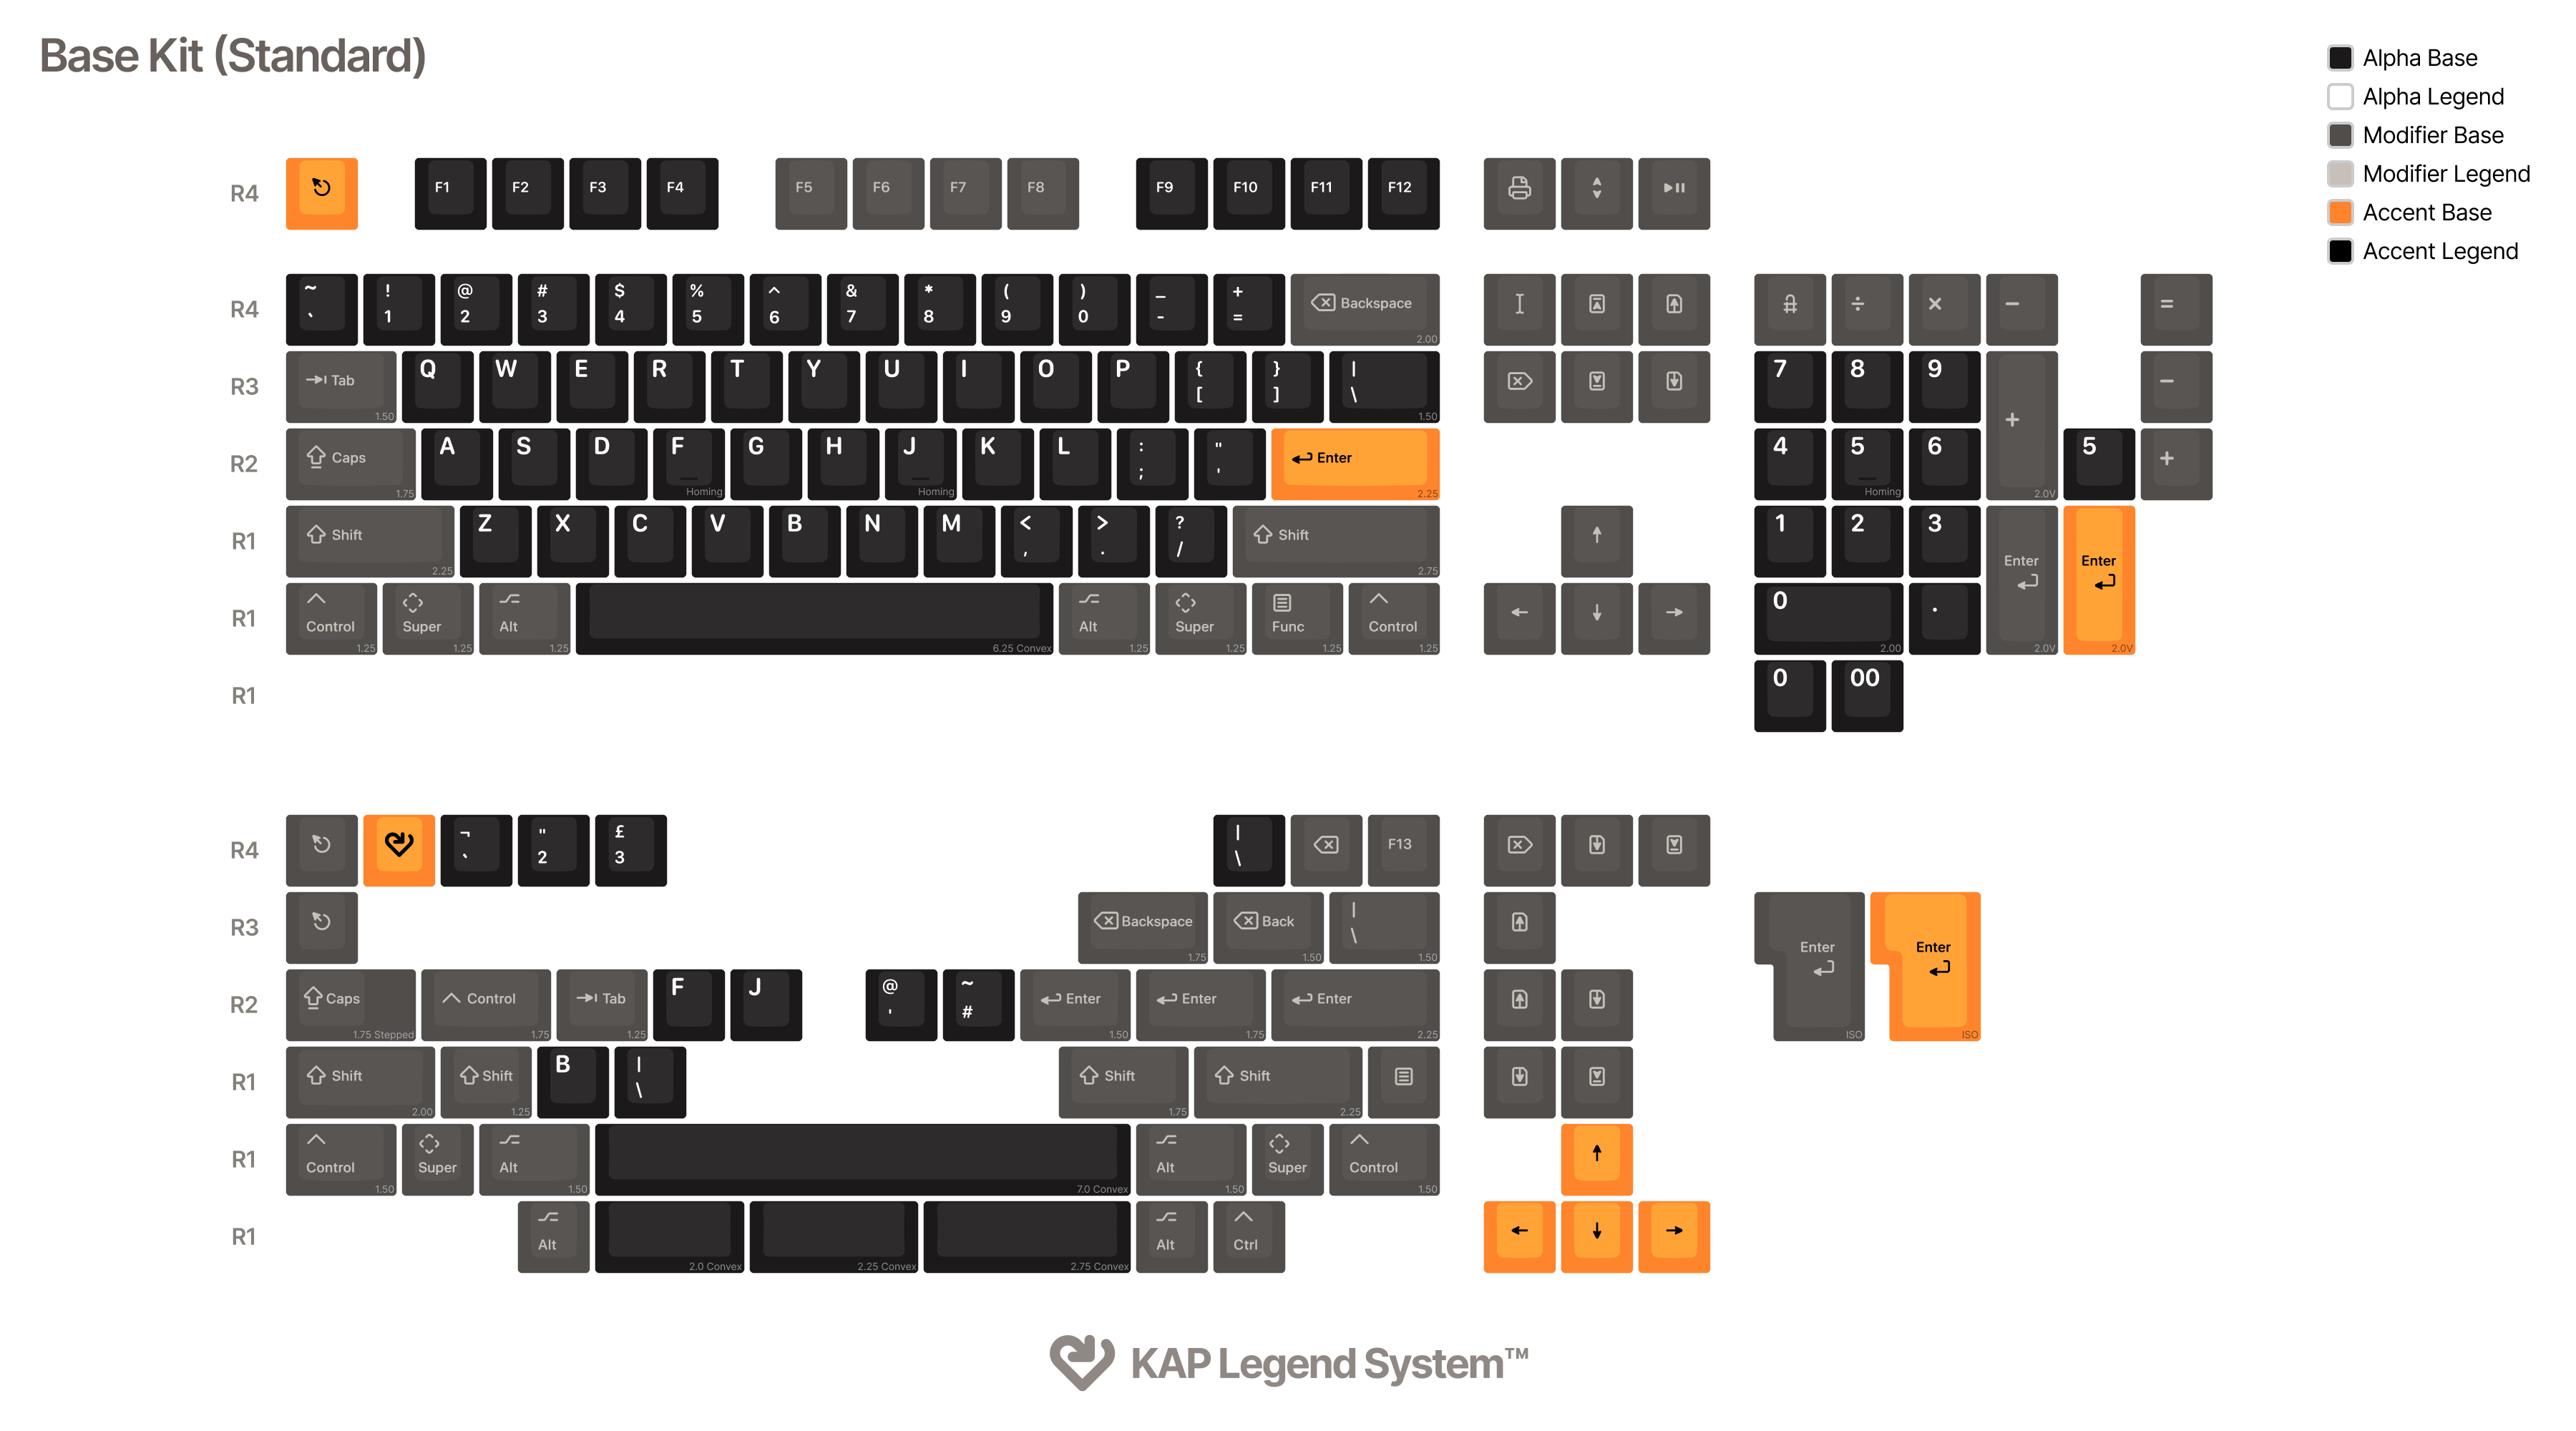
The base kit also provides support for some of the more common 40% layouts with the following keys:
- R3 Backspace 1.75u
- R3 Escape 1.0u
- R3 Delete 1.0u
- R2 Tab 1.25u
- R2 Enter 1.5u
- R2 Enter 1.75u
An additional 40s Kit is available with even more comprehensive support for smaller keyboards.
The row numbering system used by KAP Legend System follows the Chinese manufacturing convention of starting with R1 on the bottom row, with R4 corresponding to the number row; this is the opposite way around to some other manufacturers
International Base Kits
As well as the default base kit, we also provide pre-built kits for several locales. These kits combine all the necessary keys for their supported layouts as well as any keys unique to those layouts, whilst removing any redundant keys to keep the overall cost down. At present we support the following international base kits:
- German
- Spanish (Spain)
- French (France)
- JIS (Hiragana)
Note that unlike child kits these base kits are subject to a higher Minimum Order Quantity for manufacture. Once you get to the point of running a Group Buy, you may want to reach out to your preferred vendor for that region to ensure they’re willing to order enough kits to meet this MOQ.
Child Kits
To supplement the default base kit of choice for your customers, we provide templates for a number of common child kits:
- Spacebars Kit
- French Kit (France & Belgium)
- Spanish Kit (Spain & Latin America)
- NorDe Kit (Danish, German, Finnish Swedish & Norwegian)
- Nordic Kit (Danish, Finnish Swedish & Norwegian)
- 40s Kit
- Mac Kit
Sublegends
We support several sets of sublegends for alphanumeric keys, following the same modern style:
- Hangul
- Hiragana
- Katakana
- Ukraine Cyrillic
In most cases, these sublegends have their own dedicated base kit which includes sublegends for all available and supported keys. More information can be found in the Kit Templates section of the Designers Guide.
Alternate Modifiers
The default kit uses modifiers which combine both icon and text legends for a modern appearance. In addition to these modifiers, alternates with icon-only and text-only designs exist for almost all sizes and row profile of keycap. You can find out more about how to switch between modifier types in the Designers Guide.
Packaging
Base kits for KAP Legend System ship with a reusable two-tier keycap tray for storage and display, with a customizable glossy outer box. A template for the outer packaging can be found in the Designers Guide.